Creating Pixel Art Isometric Walls for Godot
Hello everyone!
For the longest time I have thought about adding visual isometric walls to Tombs of Telleran. But since they don’t impact gameplay, I kept postponing it. But no longer!
During the holidays I added walls to the game, and in this article I want to share my experience doing it in Godot.

Print screen of Tombs of Telleran showcasing the walls.
Setup
Tombs of Telleran is developed in Godot 4, which comes with a fair amount of tooling for creating grid-like maps and filling them with sprites. It can handle both 2D grids and, more importantly for me, isometric tiles. The editor lets you create maps by painting with tiles, but since I am building a roguelike, all maps will be procedurally generated and we will have to set up the maps programmatically. Fortunately, there are ways of doing so from C# (which is what I am using), so that’s the approach we will take.
Attempts with Godot’s terrain system
While you can simply assign a sprite to each tile in the grid, Godot offers a system called the terrain system. To keep it brief: it lets you assign a terrain type to each tile and have Godot pick the correct tile based on neighbouring tiles. Follow the link to the docs if you want to read more. Based on its documentation, it looks like it does exactly what I want. I had two kinds of terrain: wall and floor. But no matter how hard I tried, the tiles did not generate properly. I also got different results on different runs. It seems like other people have experienced this too. While I’m not sure if it’s the same problem I had, after reading this I decided to build my own system for placing tiles. Before looking at the system I ended up with, let’s look at the tile design first.
Example tiles - print screen from aseprite
When I was designing the tiles I first made a grid in my drawing program (aseprite) with the height and width of the tiles, 22x44px. This is the same size as for one tile in the Godot TileSet and one tile in the TileMapLayer.
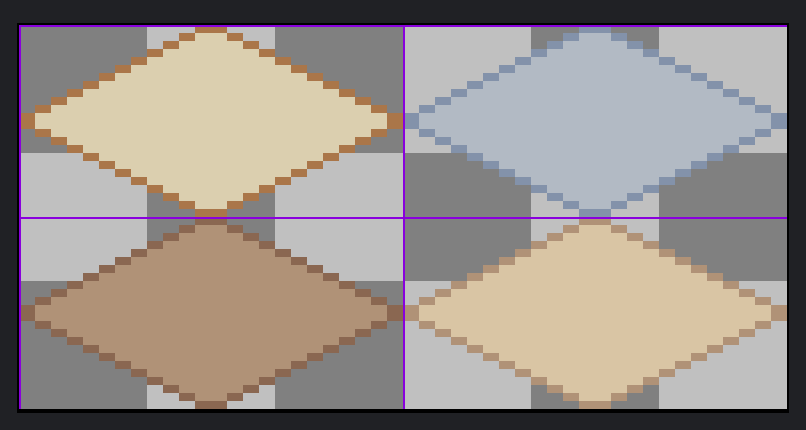
Print screen of basic tiles in Aseprite.
This worked for basic tiles, but I quite quickly wanted to add details under and at the side of the tiles.
To do this, I had to create a TileSet with tiles that were larger than the TileMapLayer tile. Godot will happily render anything outside the TileMapLayer tile. This way I could add details outside the walkable tiles themselves.
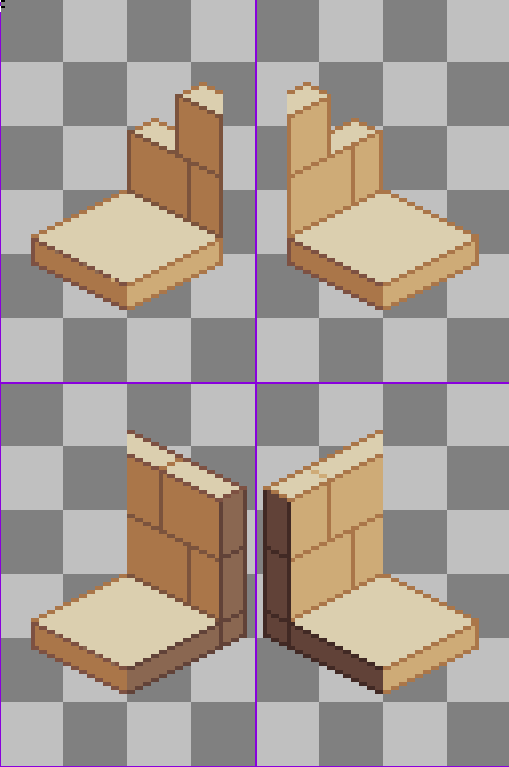
Print screen of extended tiles in Aseprite.
Aside: Yes, 22x44px is quite large!
I wanted to try and display enemies with their weapons clearly visible so the player can, at a glance, see what their abilities are (abilities are tied to weapons). That’s why I opted for larger tiles and larger actor sprites. This creates a pretty ‘zoomed in’ feeling and I’m not sure I will keep it. It is probably better to spend time creating distinguishable actor sprites and move to 32x32px tiles. This is something I will test out soon.
My Terrain System
As we saw before, the tile sprites extend quite a bit outside the tile itself. If we do not place them in the appropriate places, it will result in horrendous clipping. So how do we do that? Whenever a floor tile is discovered by the player, I use a bitmask with flags for all surrounding eight tiles indicating whether there is a wall there or not. Depending on the configuration of surrounding walls, I pick the correct tile. As far as I understand it, this is how Godot does it under the hood as well, only in a more efficient (and non-deterministic!) way.
Wrap-up
And there you have it! A simple (although somewhat manual) system for generating walls in an isometric game. If you have any questions about the approach, feel free to reach out on bluesky or subscribe to my newsletter.